Using Chainlink’s Token Manager on Kaia
Chainlink Token Manager makes it easy to deploy and manage Cross-Chain Tokens (CCTs) without writing code.


Introduction
Chainlink Token Manager makes it easy to deploy and manage Cross-Chain Tokens (CCTs) without writing code. It provides a simple interface for creating production-ready tokens and configuring cross-chain transfers using Chainlink’s Cross-Chain Interoperability Protocol (CCIP).
In this guide, you will learn how to deploy a new token from scratch, enable cross-chain functionality for an existing token, configure and manage your token through Token Manager.
Prerequisites
Before you begin, make sure you have:
- A supported wallet: MetaMask, Coinbase Wallet, WalletConnect, or Rabby Wallet
- Enough funds in your wallet to pay for gas fees on any network you are working with
Getting Started
This section walks you through the initial setup required to use Token Manager. You’ll connect your wallet, authorize access, and prepare your account to deploy or manage cross-chain tokens.
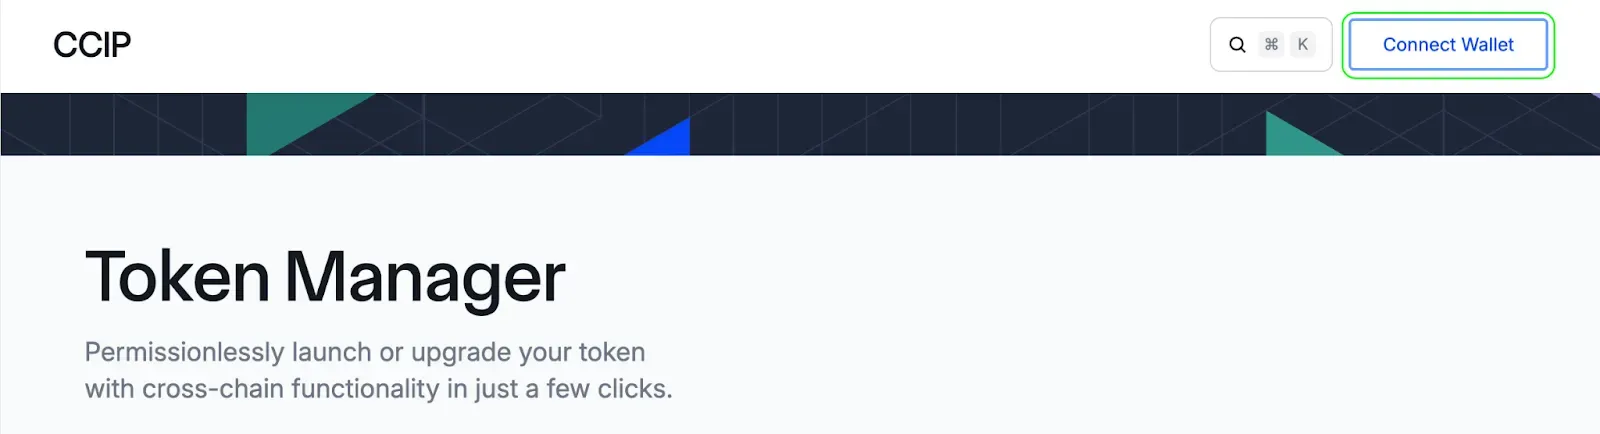
Step 1: Open Token Manager
- Navigate to Chainlink Token Manager in your browser.
Step 2: Connect Your Wallet
- Select Connect Wallet.
- Accept Chainlink Foundation’s Terms of Service.
- Choose a wallet provider. For this guide, we will use MetaMask.
Step 3: Authorize Wallet Access
- After connecting, select Authorize.

- Complete the authorization prompt displayed by your wallet provider.
Once authorization is complete, your wallet is connected and Token Manager is ready to use. You can now deploy new tokens or configure cross-chain functionality for existing tokens.
Deploying a New Token
This section walks you through the complete workflow for deploying a new cross-chain token (CCT) using the Token Manager. Follow each step in sequence to configure your token, set supply parameters, choose networks, and complete deployment transactions.
Step 1: Add a New Token
- After your wallet is connected and authorized, go to the My Tokens section on the Token Manager Dashboard.
- Select Add new token.

Step 2: Choose Deployment Flow
- In the Token Manager Wizard, select Deploy a new token.
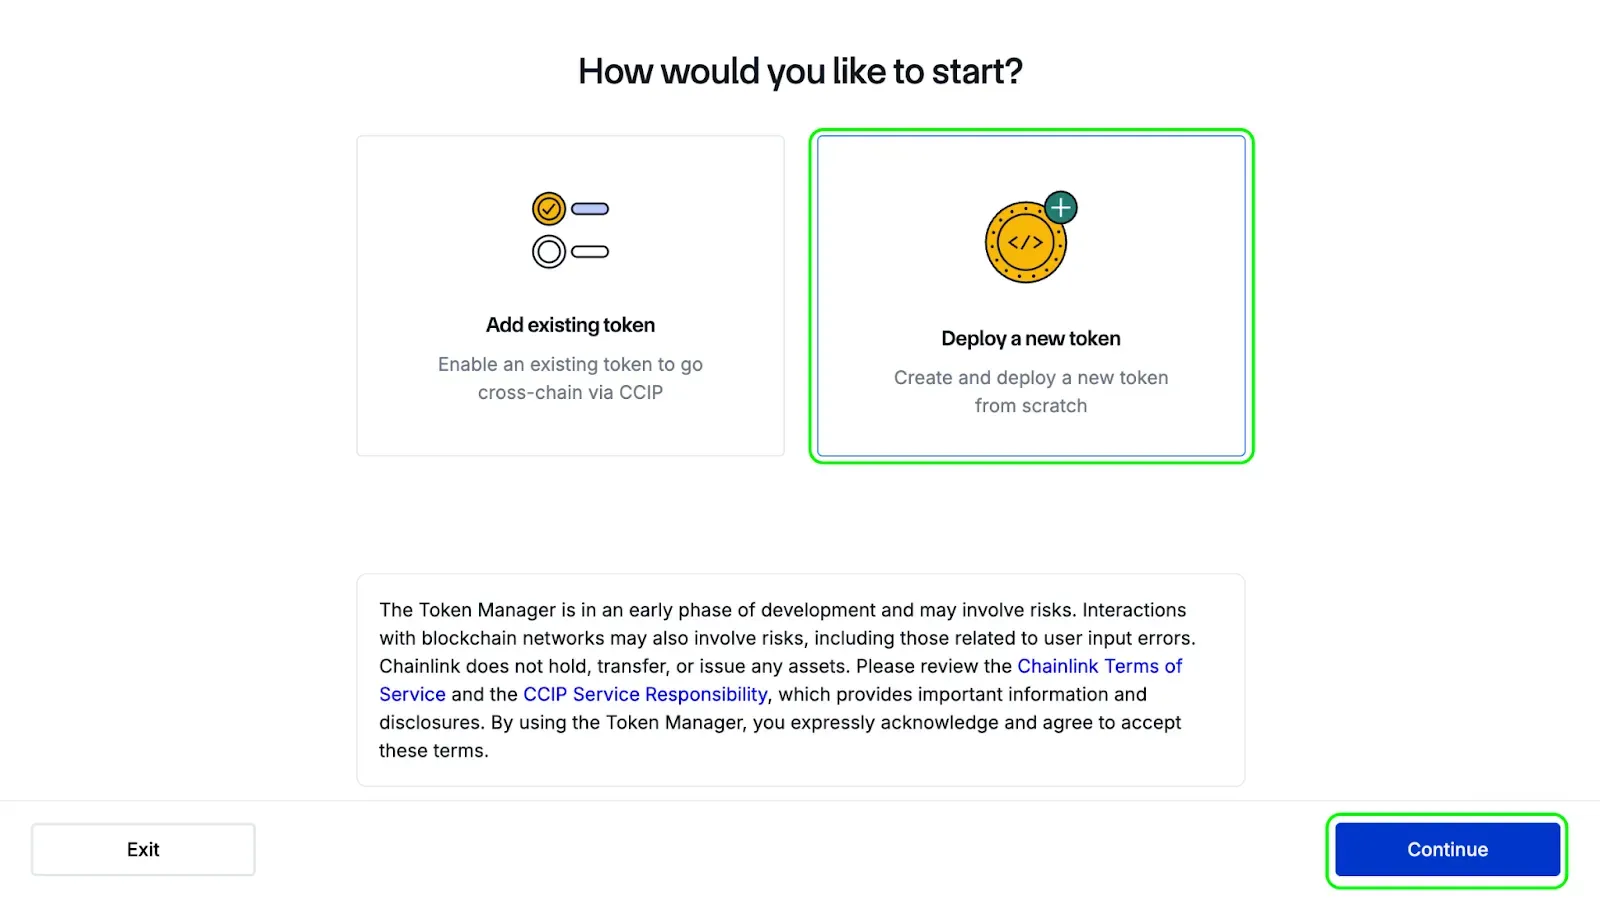
- Click Continue.
Step 3: Add Token Details
On the Details page, enter the following information for the network where your token will be deployed first:
- Network: Select Kaia Mainnet.
- Name: Enter your token name.
- Symbol: Enter your token ticker symbol. For example, Vault Tokens and vTokens.
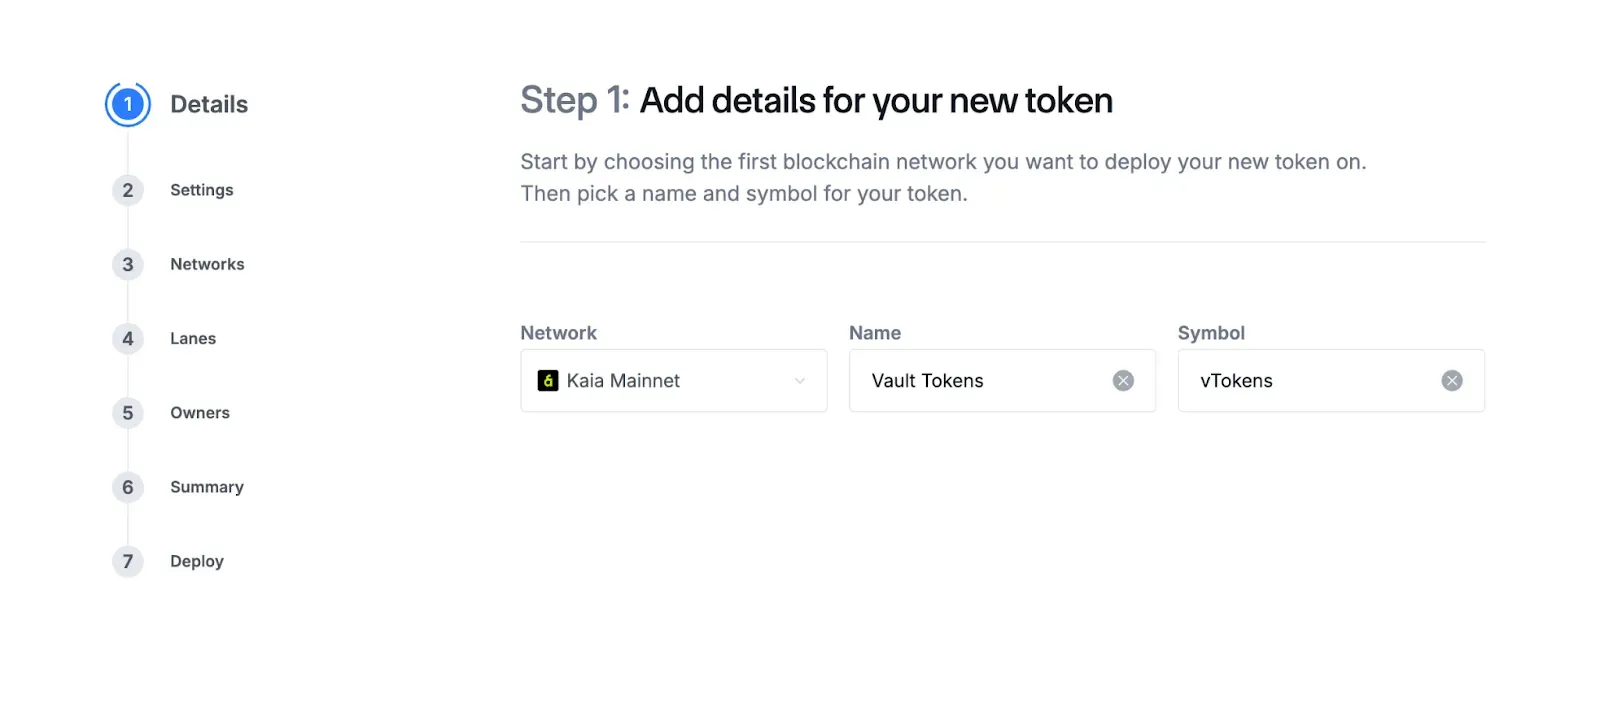
Select Continue to proceed.
Step 4: Configure Token Supply
On the Settings page:
- Supply Cap (optional):
Toggle Enable supply cap if you want to set a maximum mintable supply. Enter the cap value. - Initial Mint:
Specify the number of tokens you want to mint during deployment.
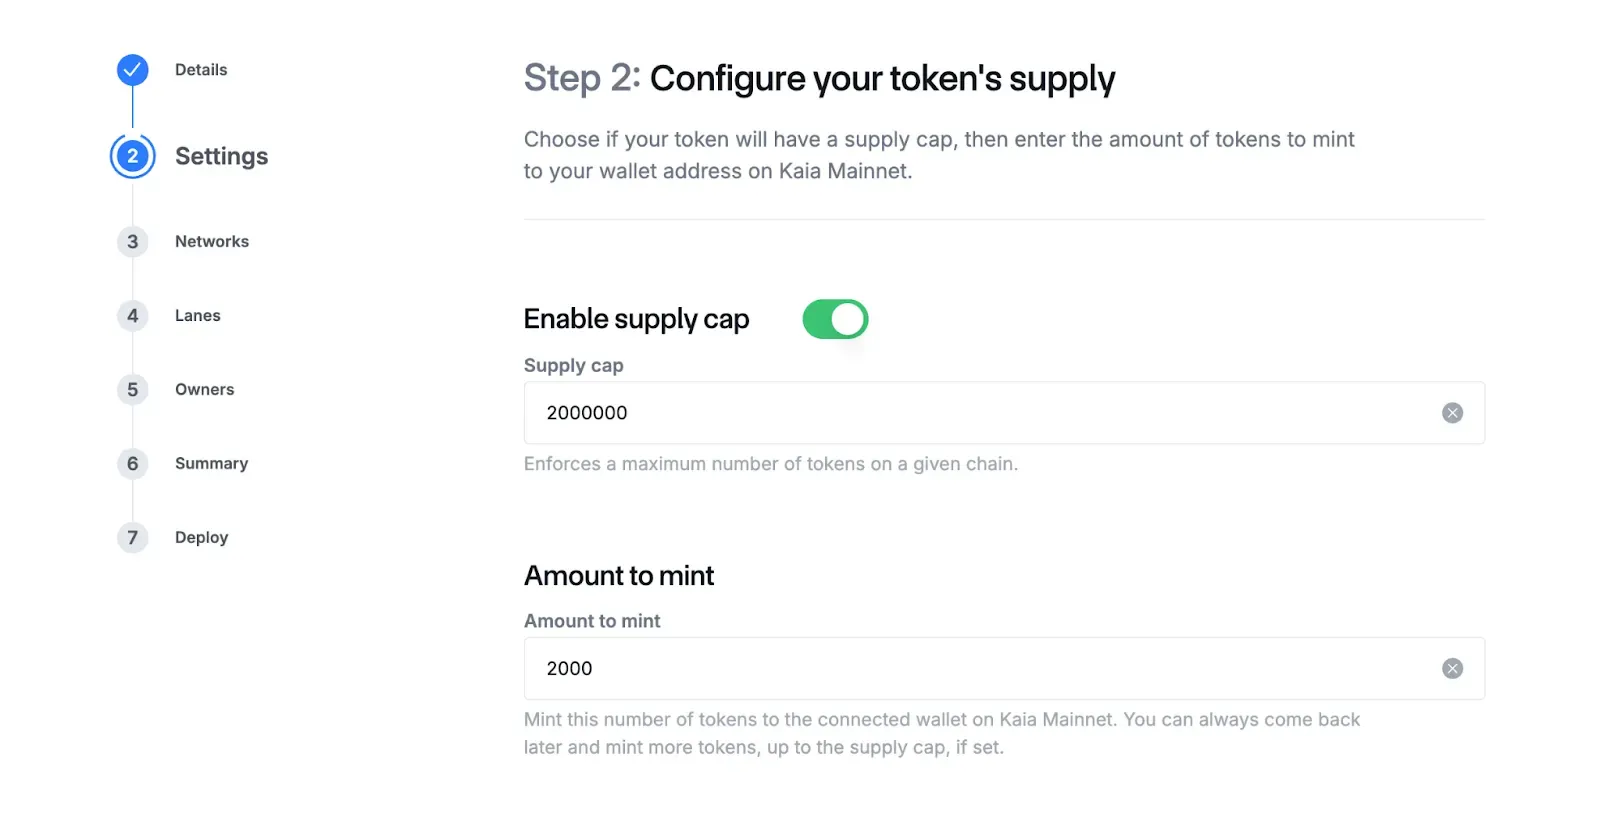
Select Continue.
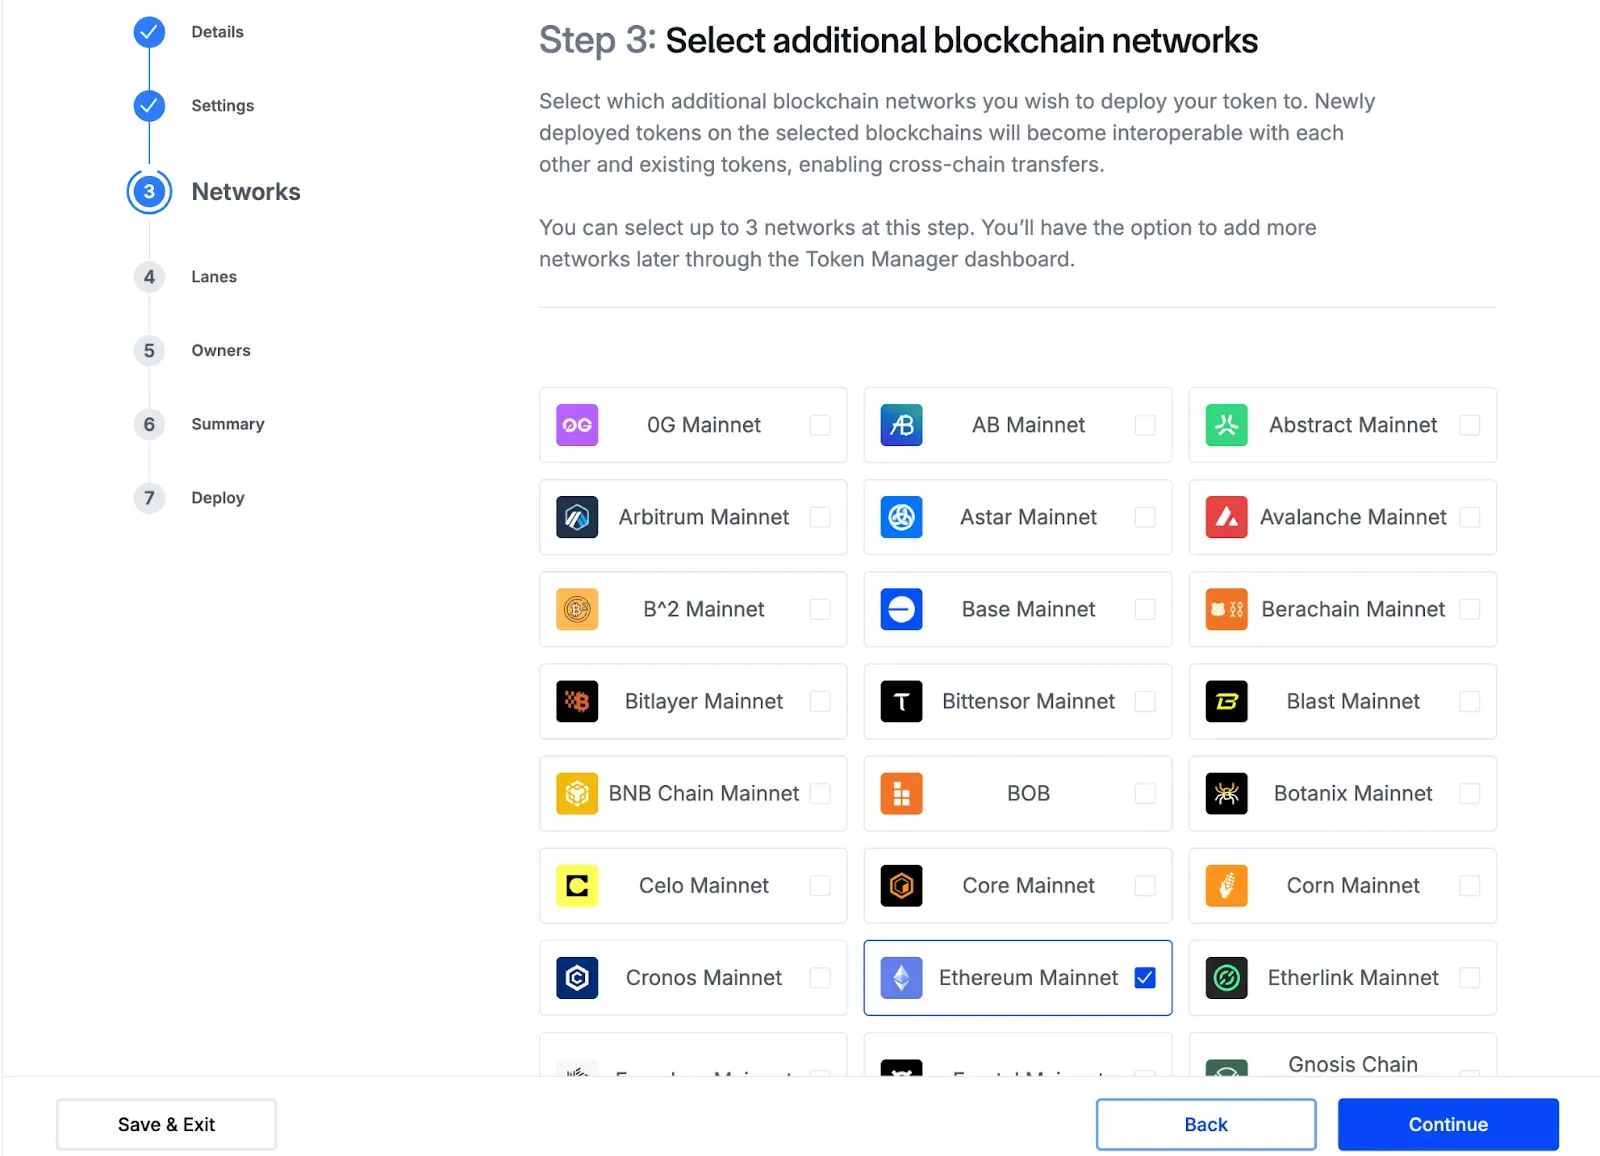
Step 5: Select Additional Blockchain Networks
On the Networks page, choose any additional blockchain networks where you want your token to be deployed. Select Continue when you’re done.
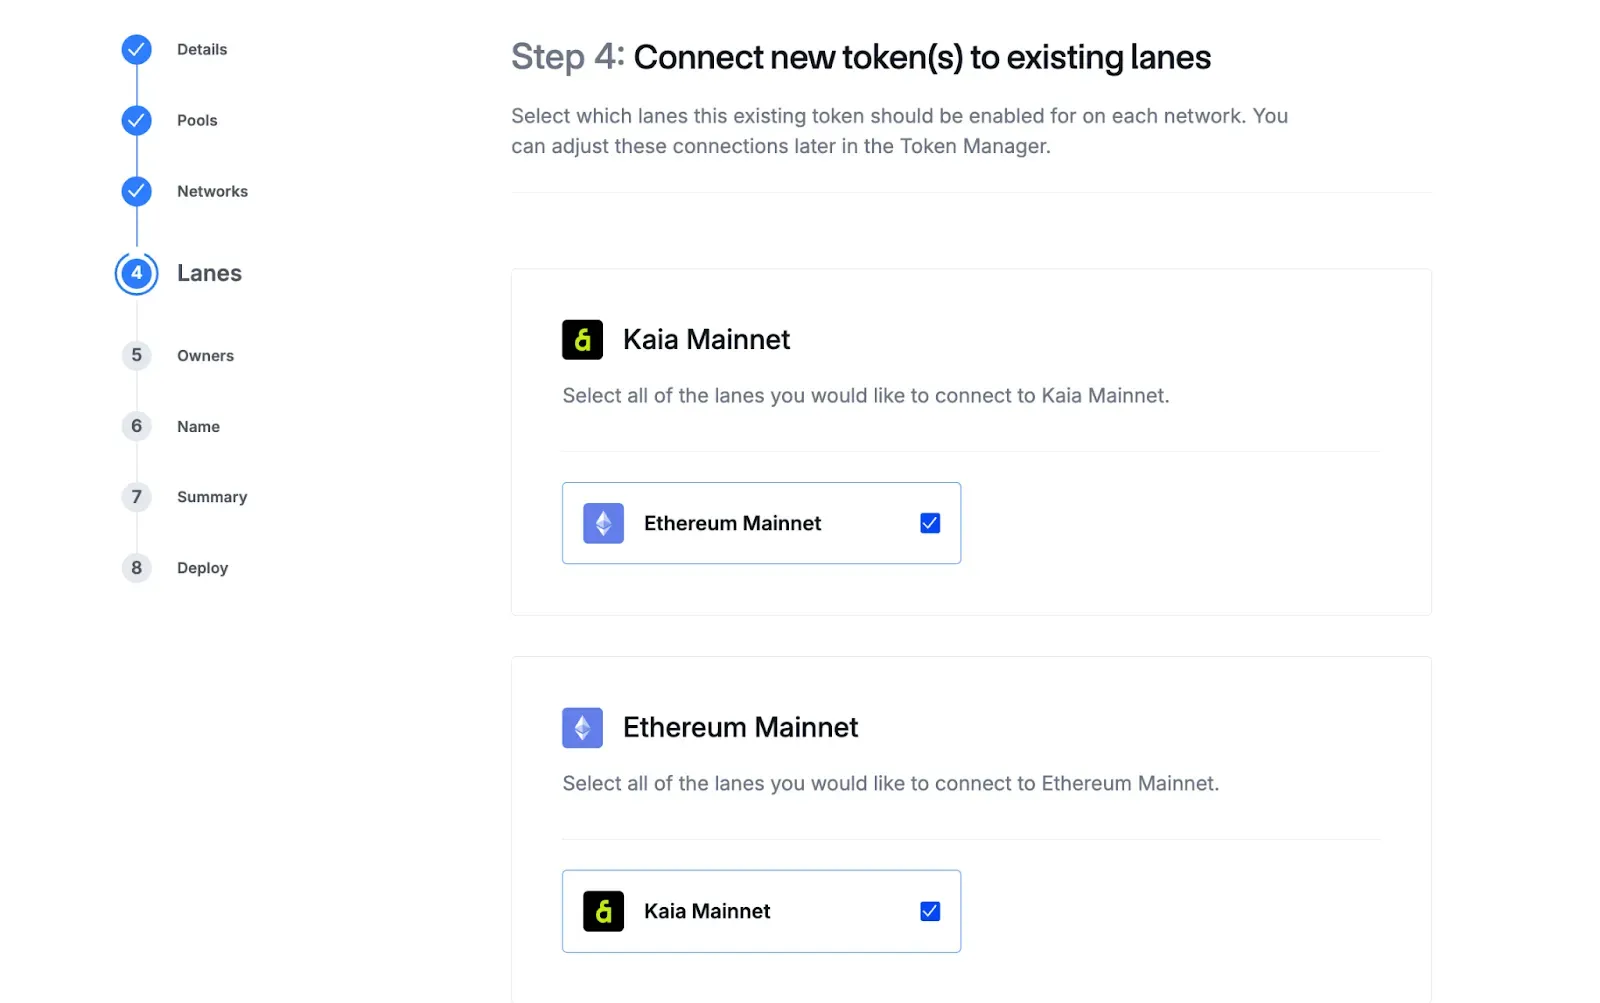
Step 6: Connect Tokens to Lanes
On the Lanes page:
- Choose the lanes your token will use on each selected network.
- Lanes determine how tokens transfer between networks.
Step 7: Confirm Owners
On the Owners page:
- Confirm the account that will perform administrative actions on each network.
- The default owner is the currently connected wallet, but you can assign different owners per network if needed.
- Select Continue.
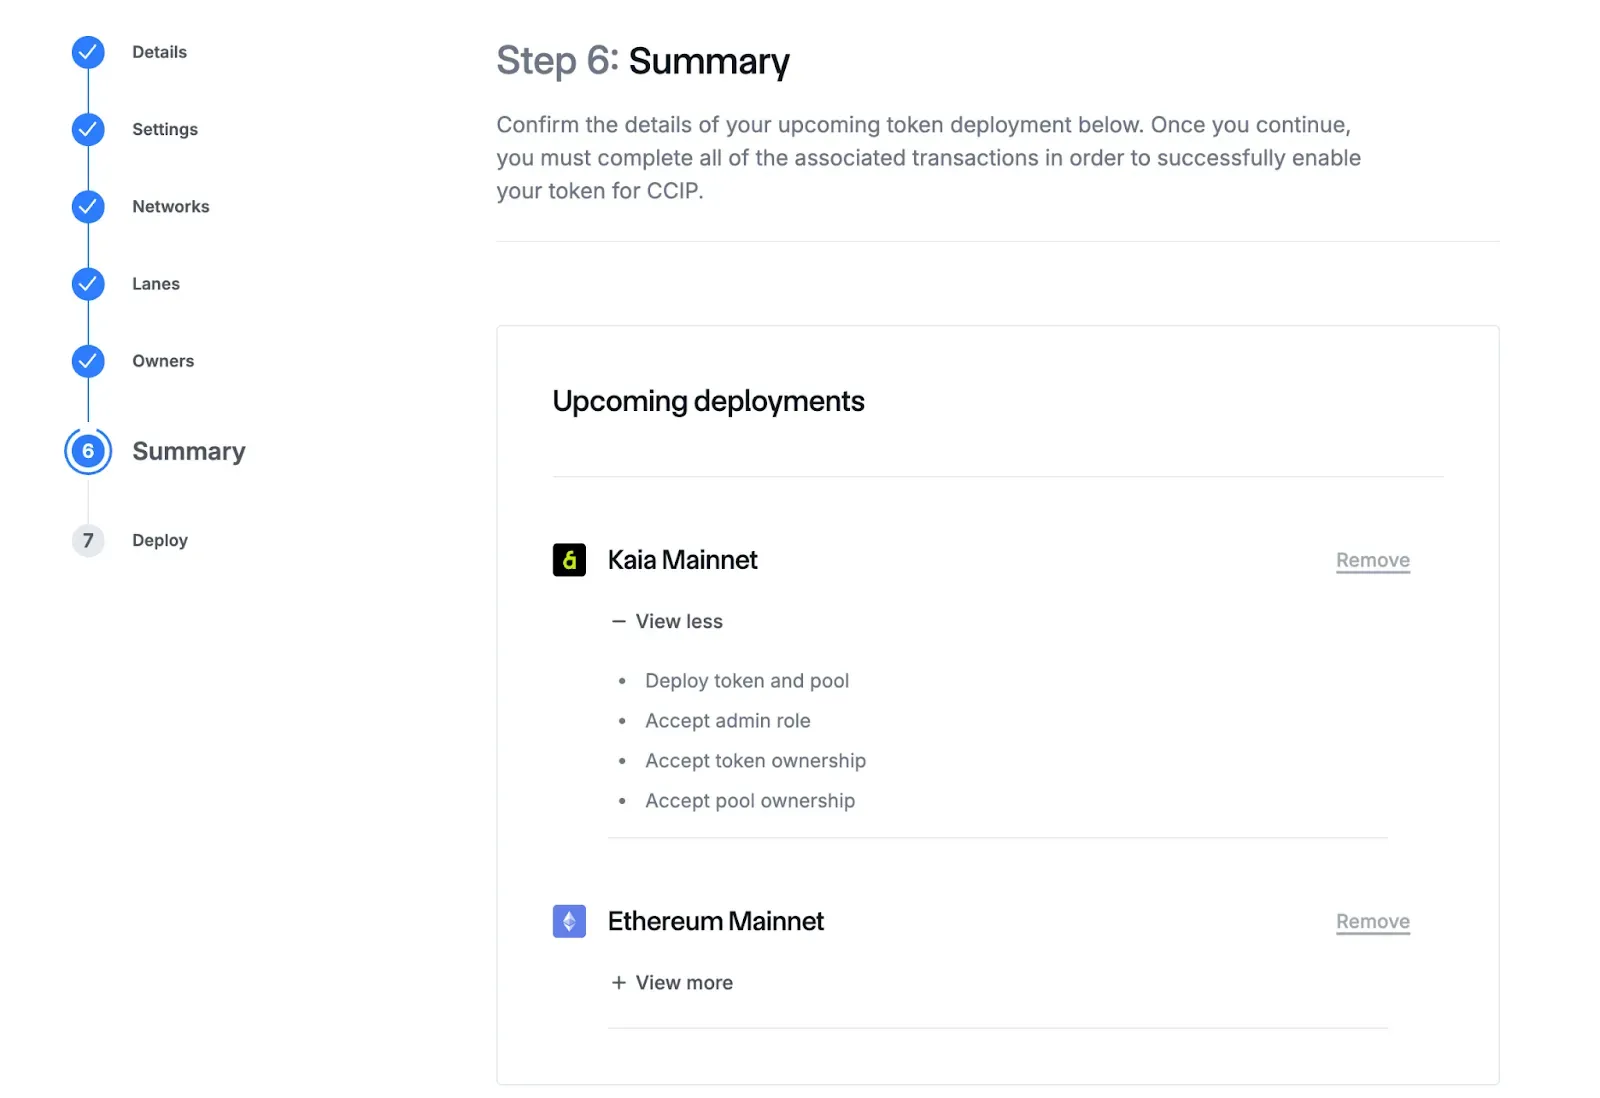
Step 8: Review Summary
The Summary page displays a full list of the networks you selected and the deployment transactions required for each network.
You can:
- Expand each network to view the transaction steps.
- Remove a network if you selected more than two networks in the previous steps.
Important:
Ensure your wallet contains enough native tokens on each network to pay the necessary gas fees.
If you need to add more networks, select Back to return to the Networks page.
Step 9: Deploy Your Tokens
The Deploy page shows the deployment steps for each network:
- Deploy token and pool
- Accept admin role
- Accept token ownership
- Accept pool ownership
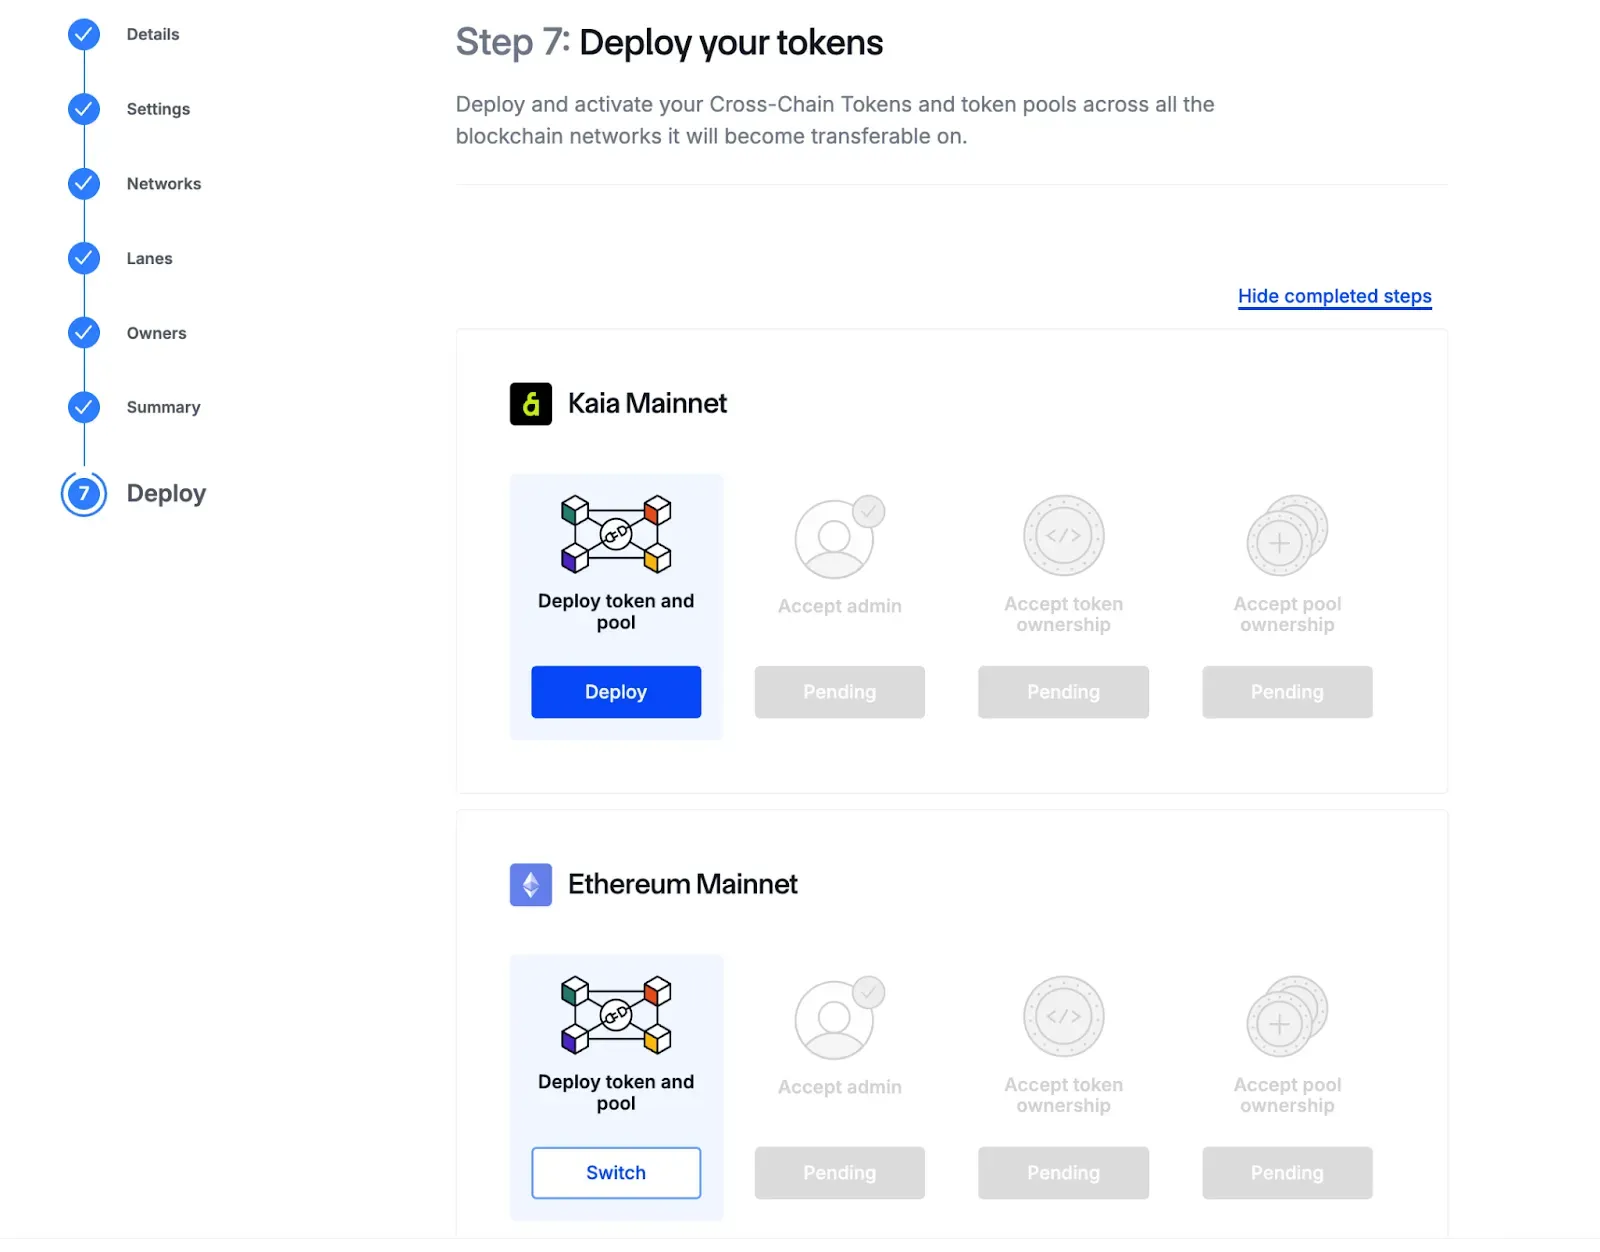
Follow this sequence:
- Start with the Deploy token and pool on the first network.
- After deployment is complete, select Accept on the remaining steps.
– Each action opens a wallet confirmation prompt.
– These actions can run concurrently. - Once you initiate all steps for one network, switch to the next network and repeat the process.
– You don’t need to wait for the first network’s steps to finish.
When all steps are completed across all networks, Token Manager marks each one as Done.
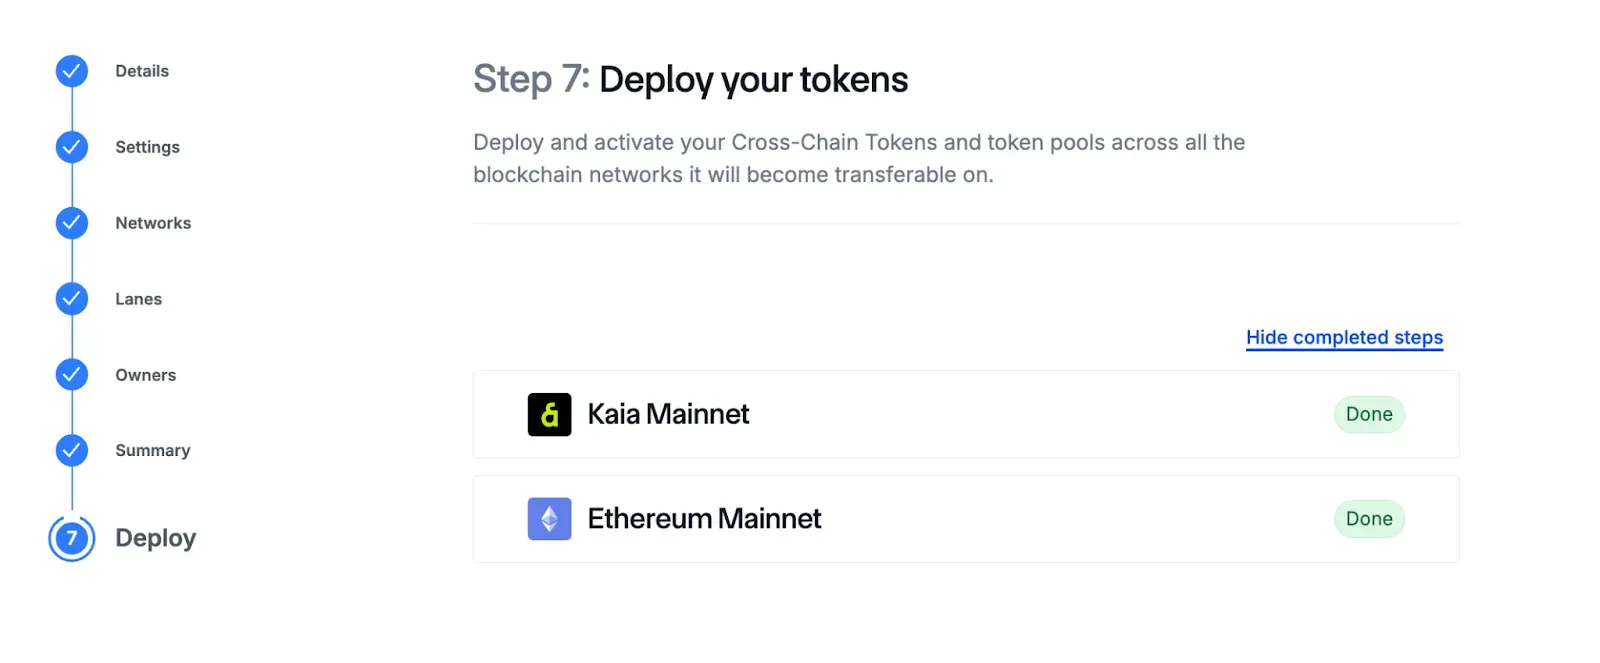
Select Continue.
Step 10: Deployment Complete
After deployment, Token Manager displays a confirmation message.
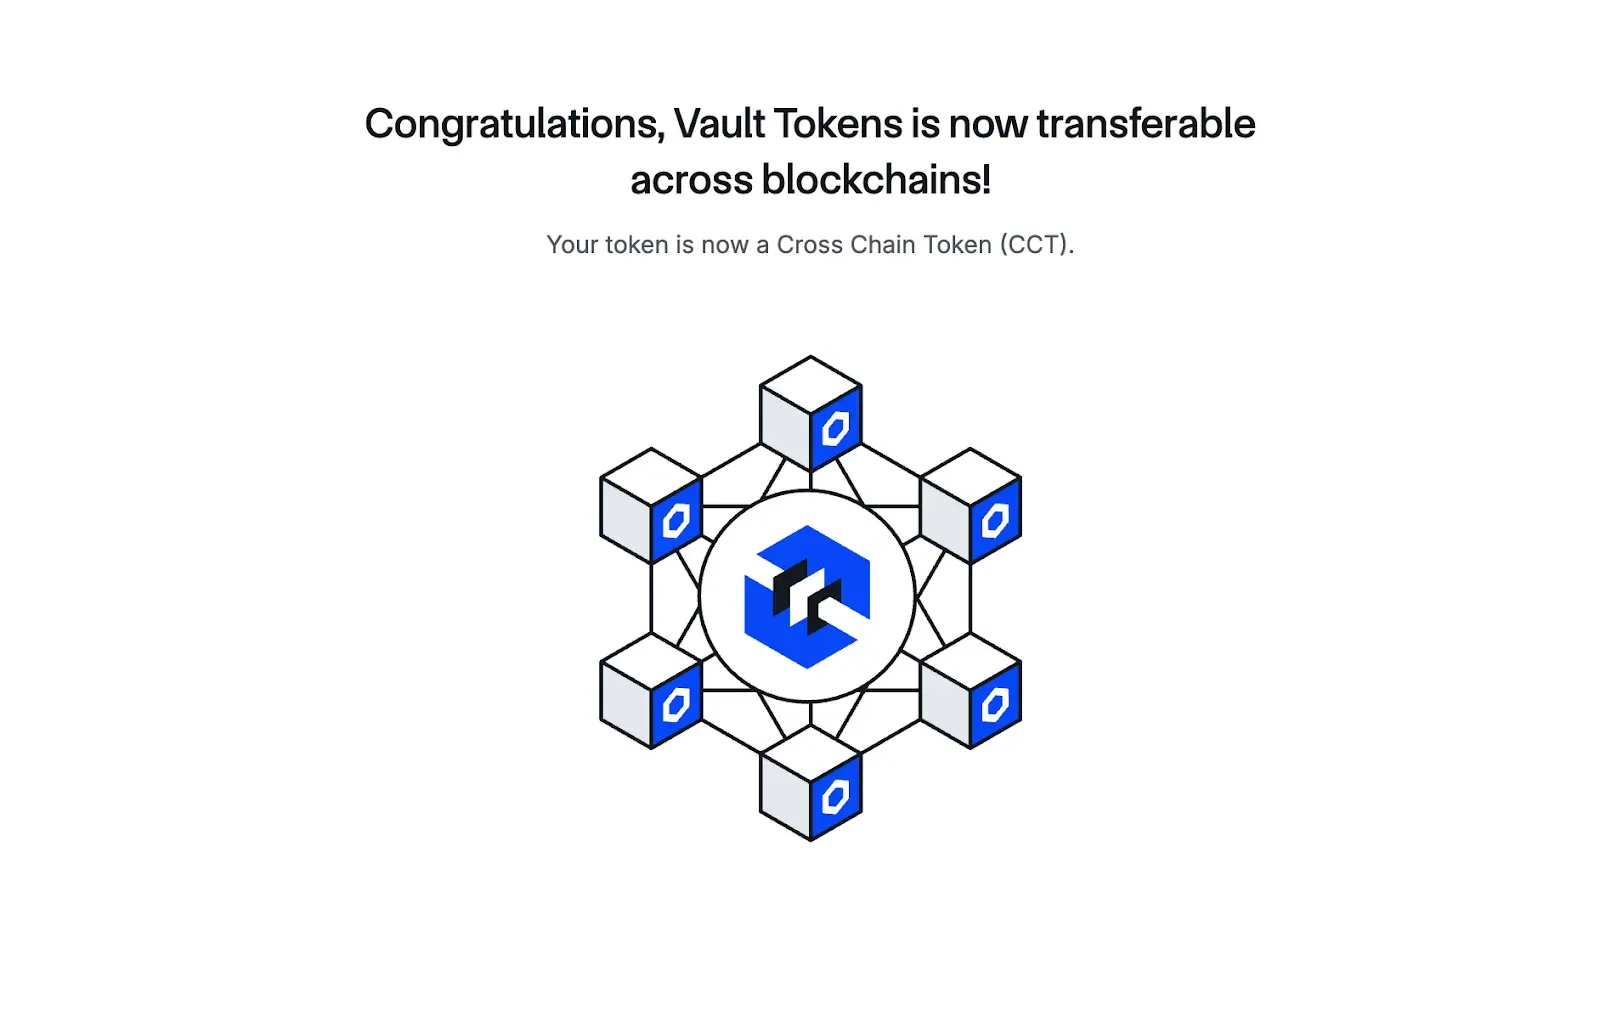
You can now view your newly deployed token from the Dashboard.
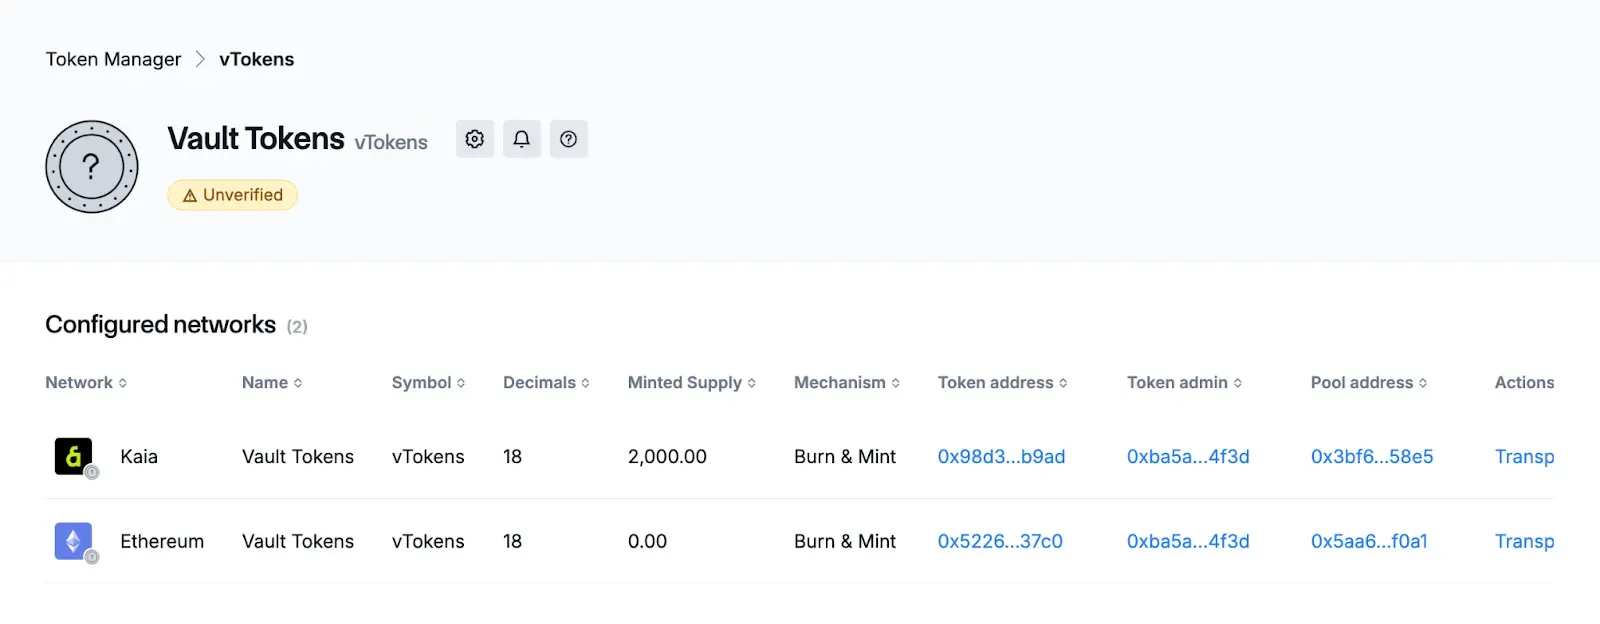
Adding an Existing Token
You can use Token Manager to enable cross-chain functionality for a token you have already deployed. Token Manager allows you to create token pools, register admin permissions, and optionally deploy your token on additional networks using the Burn and Mint mechanism.
Before you begin, ensure the token contract supports:
- Registration functions
- Transfer functions (supports burn and mint mechanism)
If the contract does not meet these requirements, Token Manager displays an error:
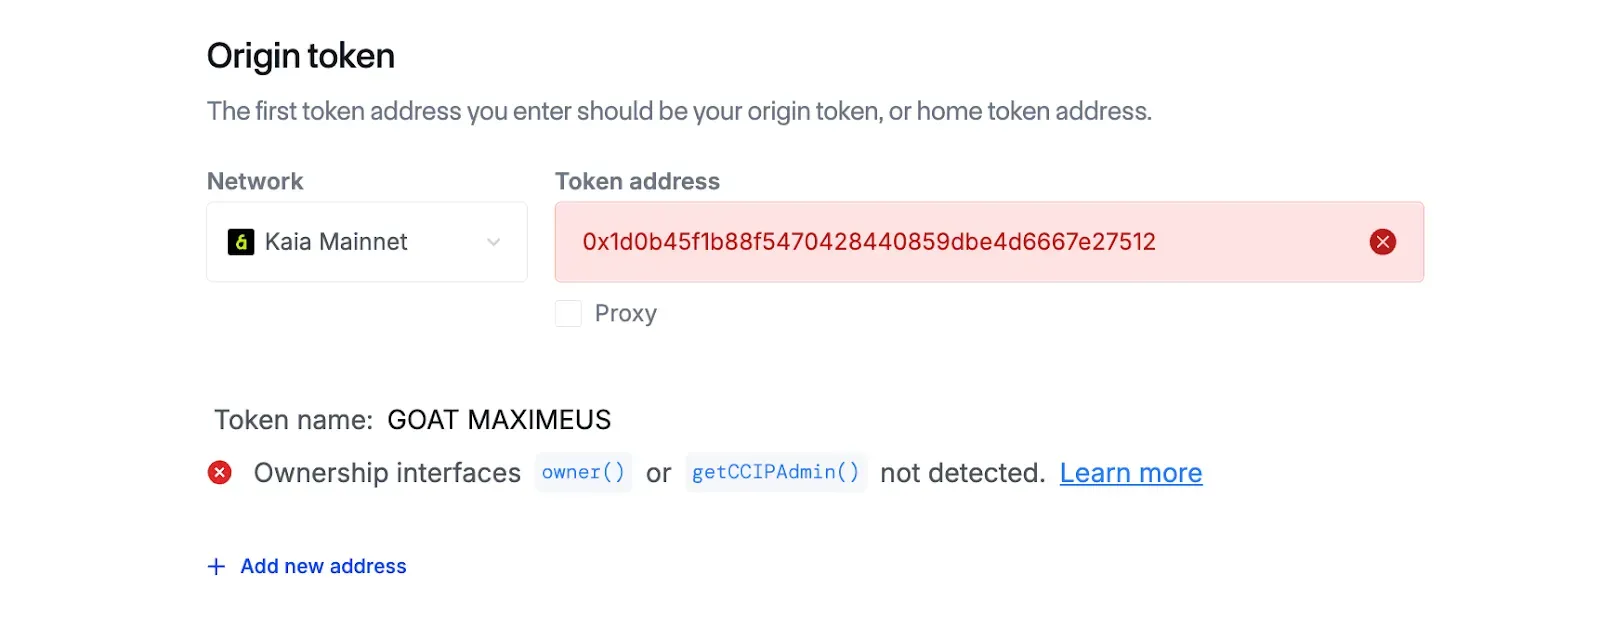
For demonstration purposes, this guide uses the following contract:
// SPDX-License-Identifier: MIT
// Compatible with OpenZeppelin Contracts ^5.5.0
pragma solidity ^0.8.27;
import {ERC20} from "@openzeppelin/contracts/token/ERC20/ERC20.sol";
import {ERC20Burnable} from "@openzeppelin/contracts/token/ERC20/extensions/ERC20Burnable.sol";
import {Ownable} from "@openzeppelin/contracts/access/Ownable.sol";
contract MyToken is ERC20, ERC20Burnable, Ownable {
    address CCIPAdmin;
    constructor(address recipient, address initialOwner, address CCIPAdmin_)
        ERC20("MyToken", "MTK")
        Ownable(initialOwner)
    {
        _mint(recipient, 1000 * 10 ** decimals());
        CCIPAdmin = CCIPAdmin_;
    }
    function mint(address to, uint256 amount) public onlyOwner {
        _mint(to, amount);
    }
    function burn (uint256 amount) public override  onlyOwner {
        burn(amount);
    }

    function burnFrom(address account, uint256 amount) public override  onlyOwner {
        burnFrom(account, amount);
    }

    function setCCIPAdmin(address CCIPAdmin_) public onlyOwner {
         CCIPAdmin = CCIPAdmin_;
    }
    function getCCIPAdmin() public view returns (address) {
        return CCIPAdmin;
    }
}
Step 1: Enter Your Existing Token Addresses
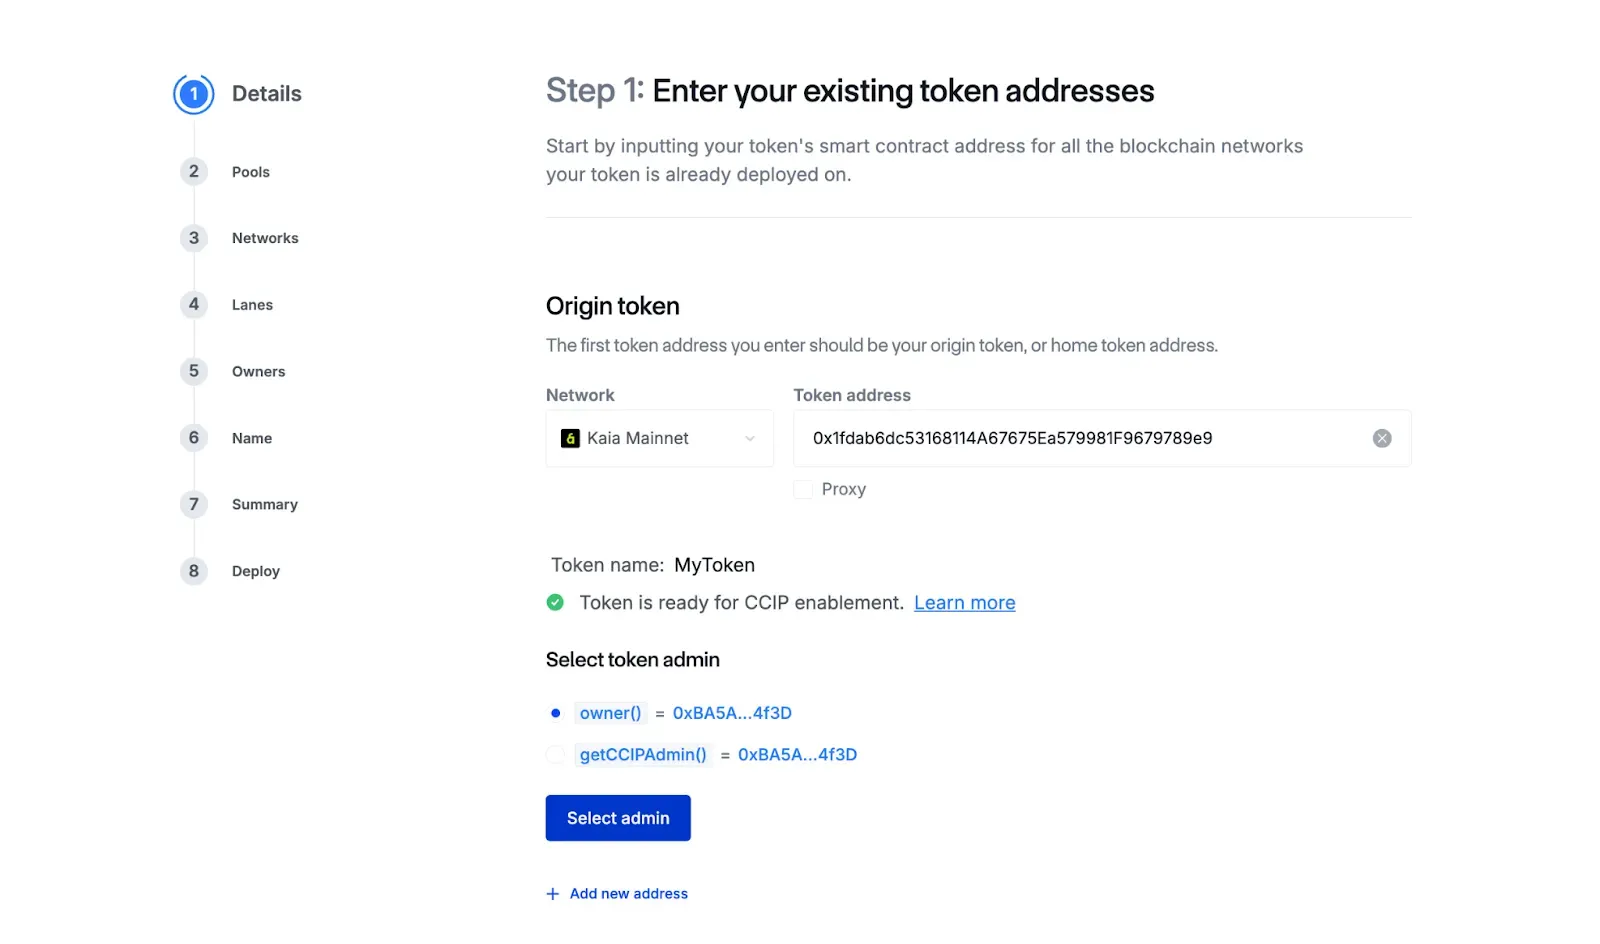
- On the Details page, enter the contract address of your token for each network where it has already been deployed.
– As you add each address, Token Manager runs validation checks to confirm:
–The token supports required admin functions
–The token supports the required transfer mechanism
– To add more networks, select + Add New Address.
–When you have entered all relevant token deployments, select the checkbox:
These are all of the tokens I currently want to enable on CCIP.
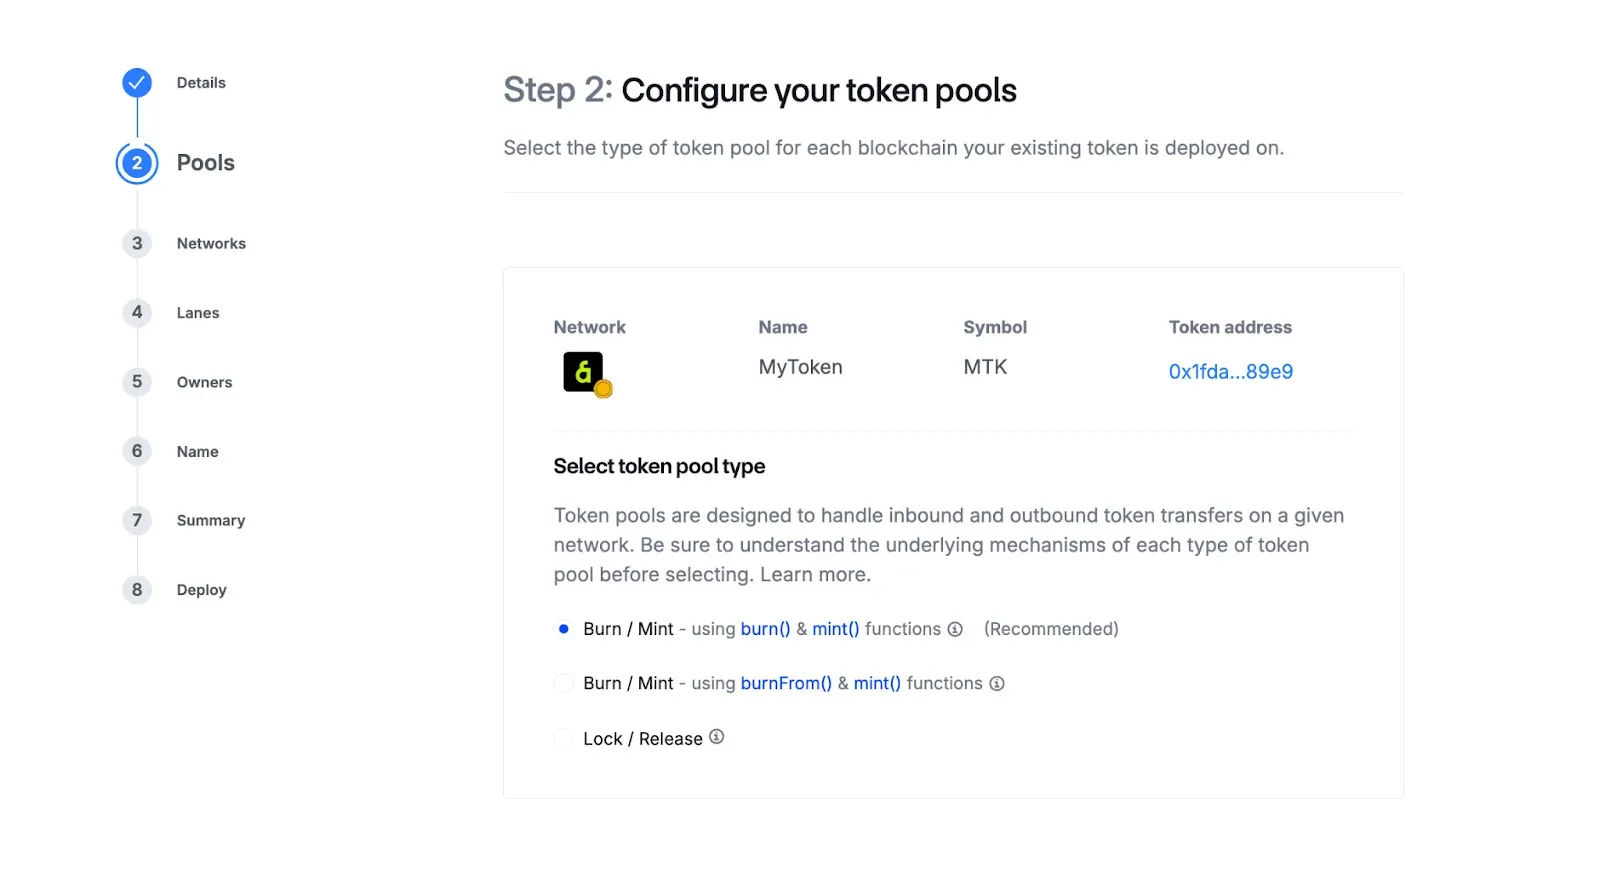
Step 2: Configure Your Token Pools
- On the Pools page, choose the token pool mechanism to handle value transfer between networks.
You can select either of these:
– Burn / Mint
– Lock / Release - Depending on your token contract, you may have more than one option for Burn / Mint. For this guide, we will use the Burn / Mint option.
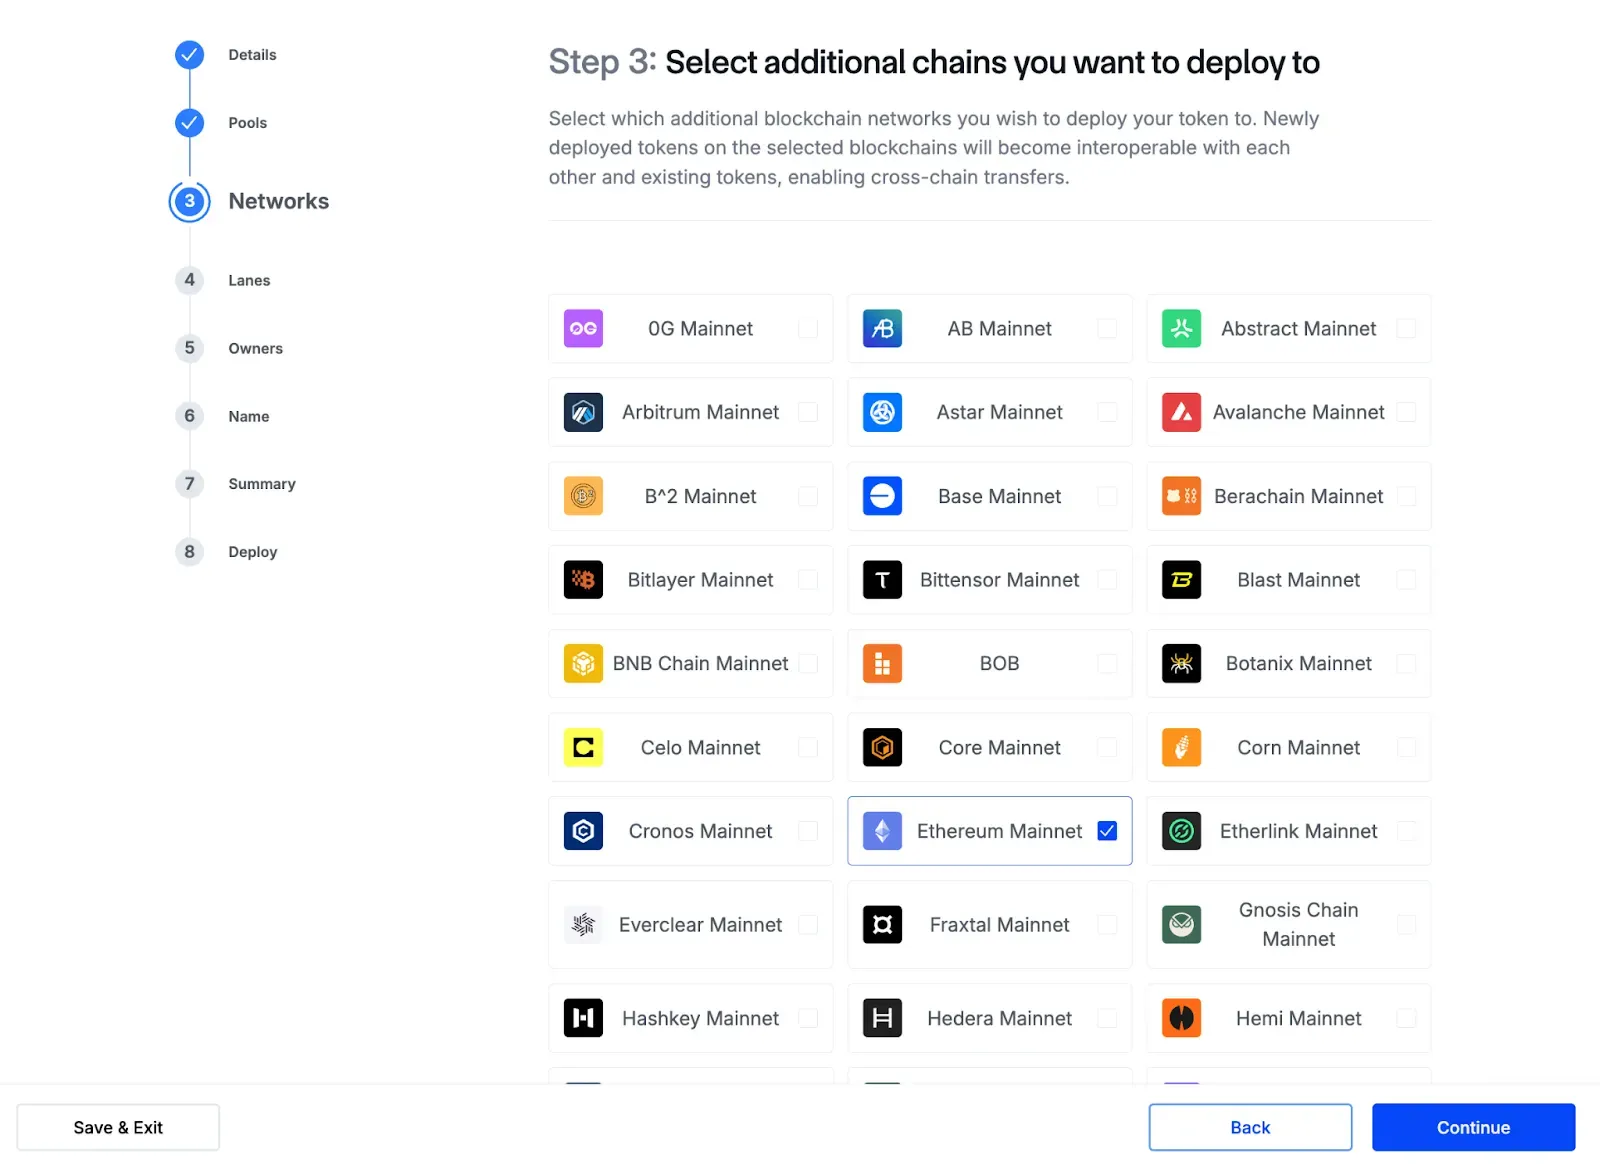
Step 3: Select Additional Blockchain Networks
- On the Networks page, select any additional networks where you want Token Manager to deploy your token.
- For new networks, Token Manager automatically configures your token to use the Burn and Mint mechanism. Review the token contract and token pool contract documentation if needed.
Step 4: Connect Tokens to Lanes
- On the Lanes page, choose the lanes that the token will use to transfer across each selected network.

Step 5: Confirm Owners
- On the Owners page, confirm the account that will have admin rights for the token on each network.
- The default owner is the currently connected wallet, but you can assign different owners per network if required.
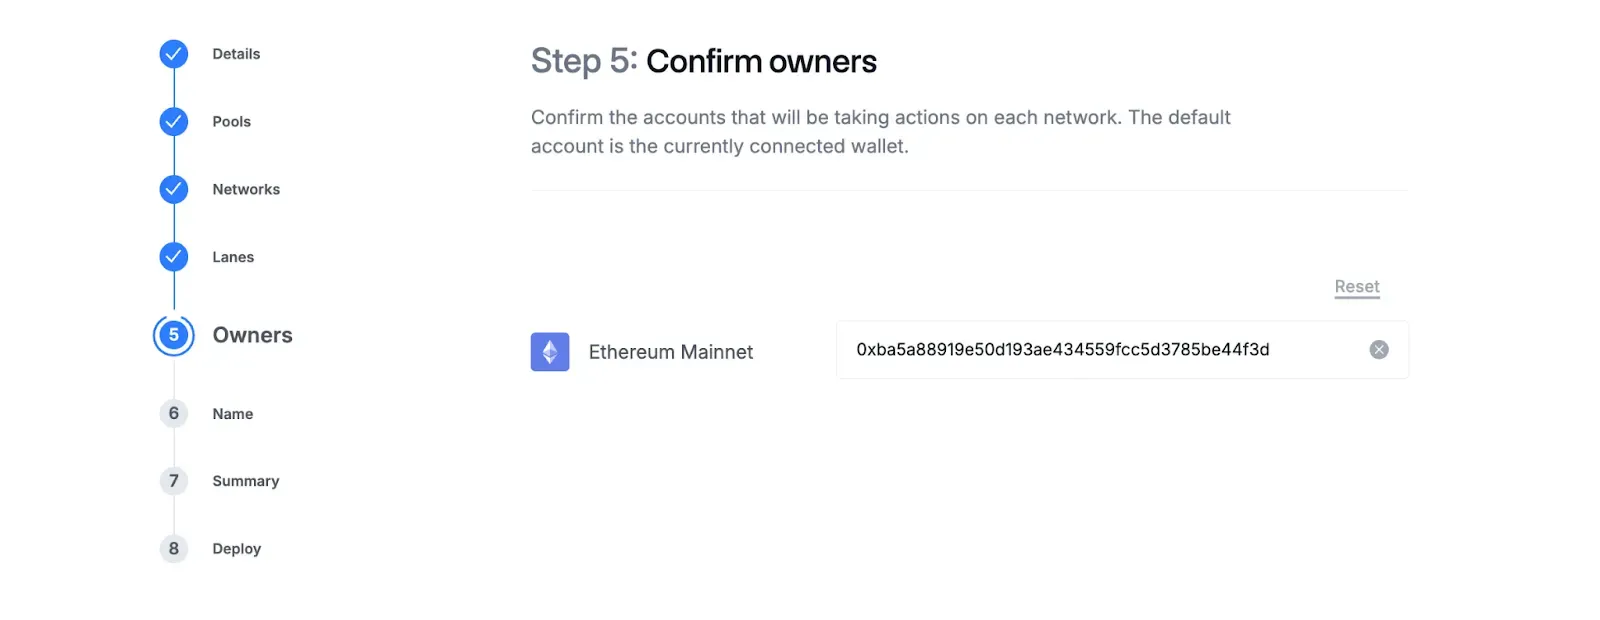
- Select Continue.
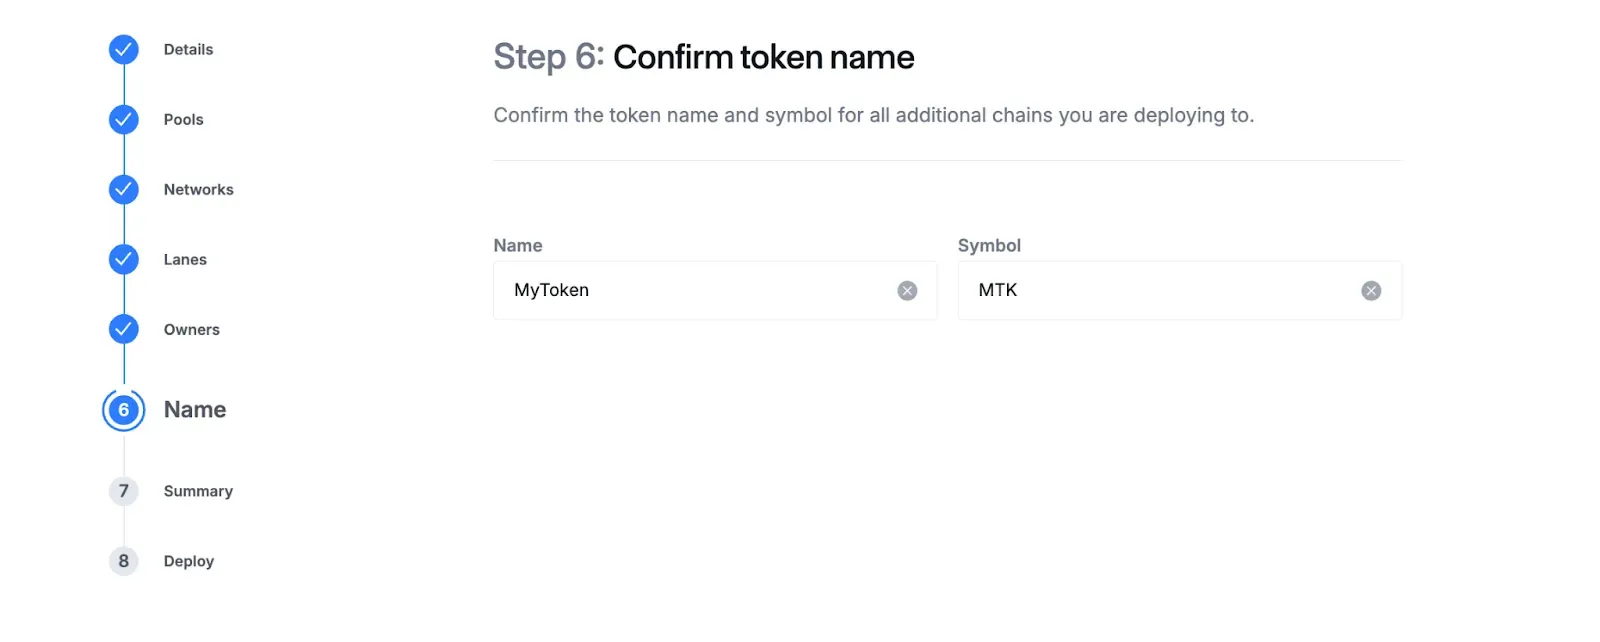
Step 6: Confirm Token Name
- On the Name page, confirm the token’s name and symbol for any new chains you plan to deploy to.
- Ensure that the name and symbol are consistent across all networks.
Step 7: Review Summary
- On the Summary page, review all selected networks and the deployment actions required.
- Expand each network to see the transactions Token Manager will execute.
- If you select more than two networks, the Remove action becomes available.
- If you only selected two networks, Remove remains disabled.
- To add more networks, return to the Networks page.

Step 8: Deploy Your Tokens
The Deploy page lists all actions required to integrate your existing token into the cross-chain system.
For each network, Token Manager guides you through:
- Deploy token pool for existing token
- Grant Burn / Mint privileges (manual step)
- Register admin
- Accept admin role for the token pool
- Set token pool address
- Accept ownership of the token pool.
For networks with other tokens already deployed, Token Manager also prompts you to update existing token pools so they recognize the newly added token.
At each step, confirm the transactions in your wallet. Once all steps are completed across all networks, Token Manager displays a success message.
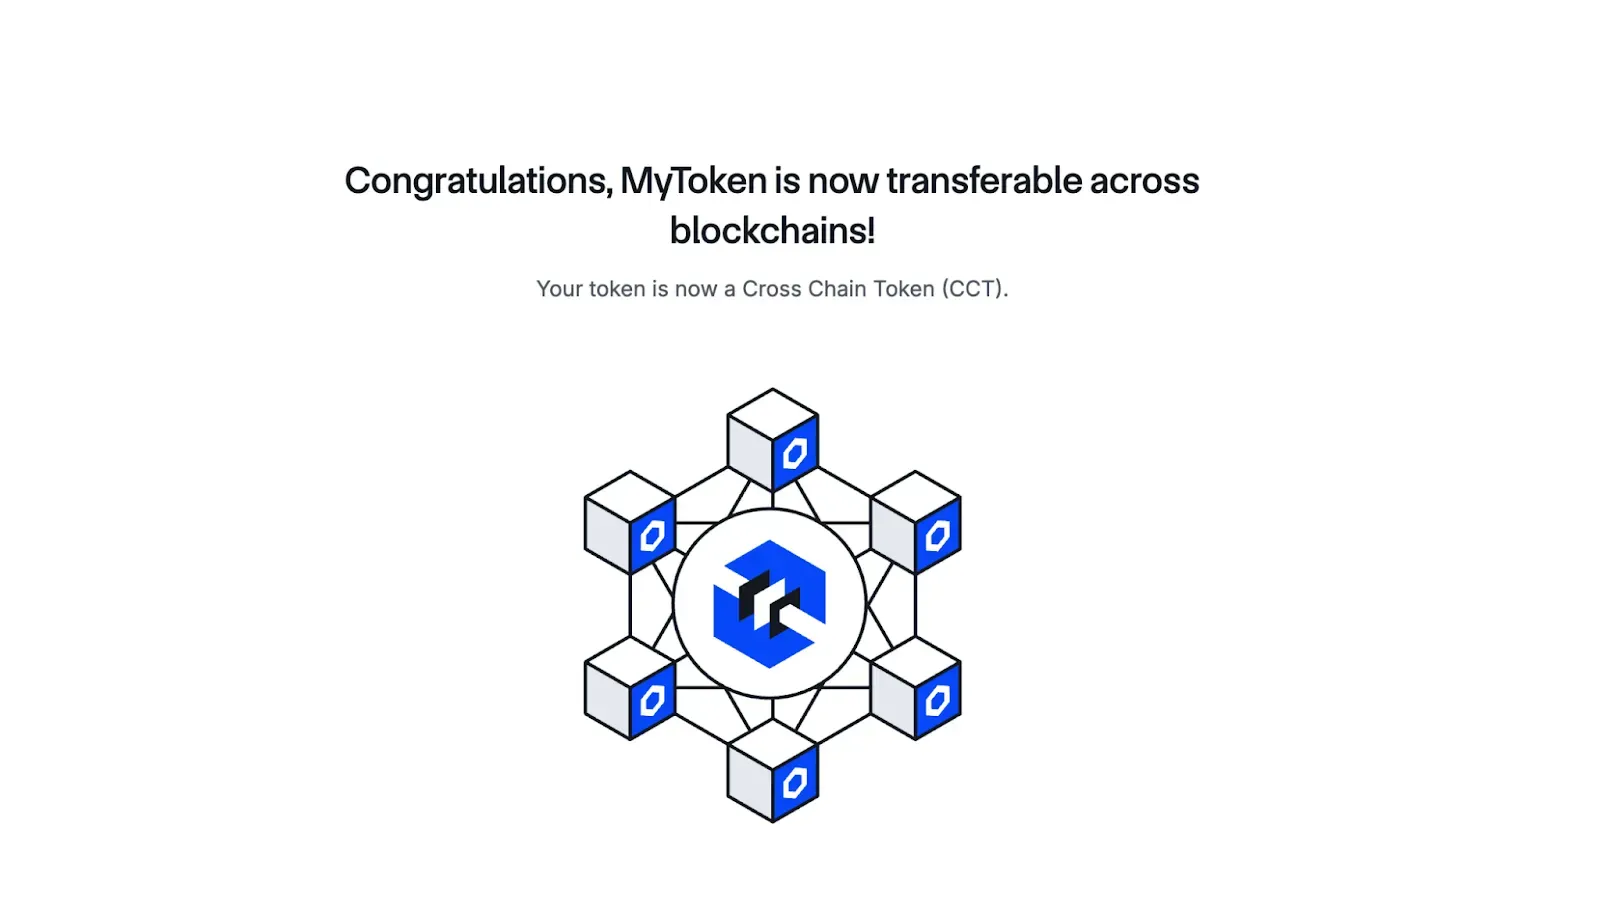
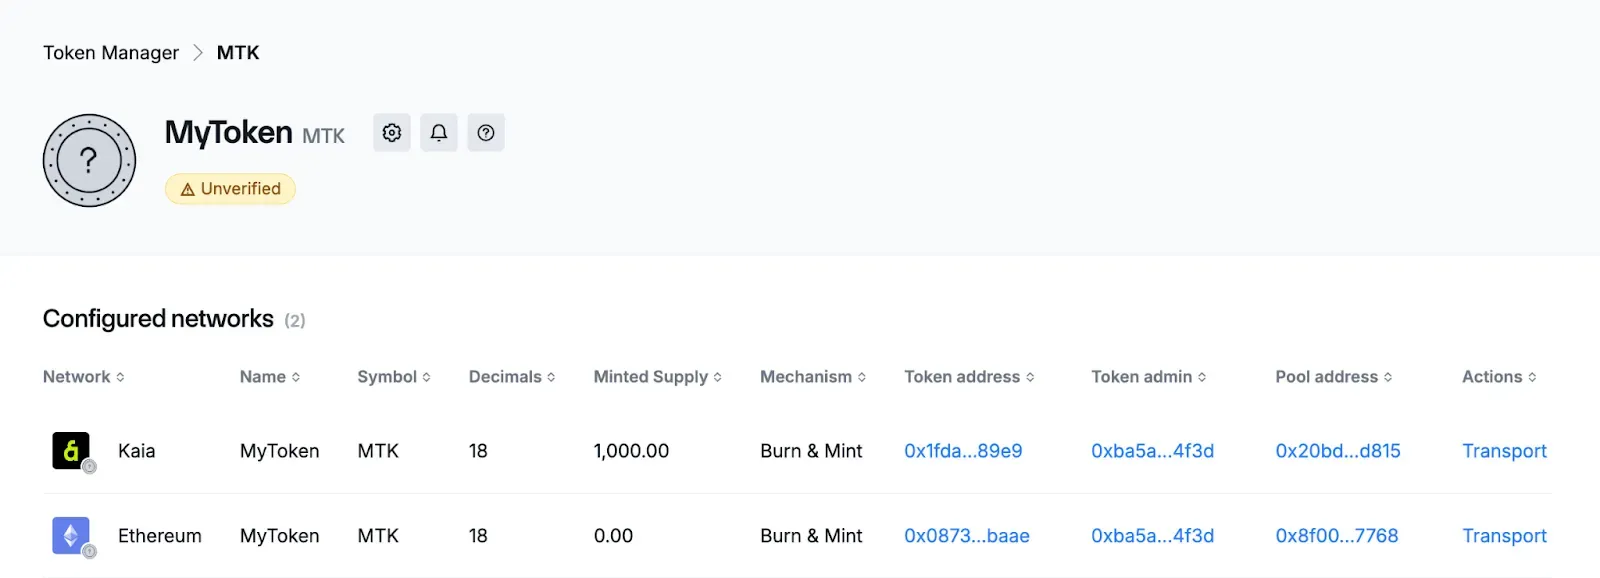
You can now view your updated Token Page from the Dashboard.
Conclusion
Using Chainlink Token Manager on Kaia makes it easier to deploy, configure, and manage cross-chain tokens without writing custom code. Whether you created a new token or enabled an existing one, the Token Manager guides you through every required step — from token setup and pool creation to cross-chain configuration and ownership assignments.
After completing your deployment, you can return to the Token Manager Dashboard at any time to monitor and manage your Cross-Chain Token (CCT). The dashboard provides quick access to token details, lanes, and pool information that help you maintain your token across multiple chains.
To continue your learning journey, explore the following: